For reference:
Page number = manual number, not the PDF page number
Diagram number = number on the diagram "plate" (used generically, must look up part number from tables following the diagram.
Part number is the specific Studebaker part number.
9A is the 1950 Champion, 17A is the 1950 Commander
[Purpose]
We looked into servicing the 17A front shocks (lever arm damper type). We bought oil suited for this purpose and started to clean back the years of grim and build up. Note: this was done from the wheel well side first. After most of the cleaning was done we finally looked through the engine compartment side at the lever arm attachment. This is when we noticed the previous owner used the lever arm bolt for the small block engine motor mount. This was corrected in the motor mount project.
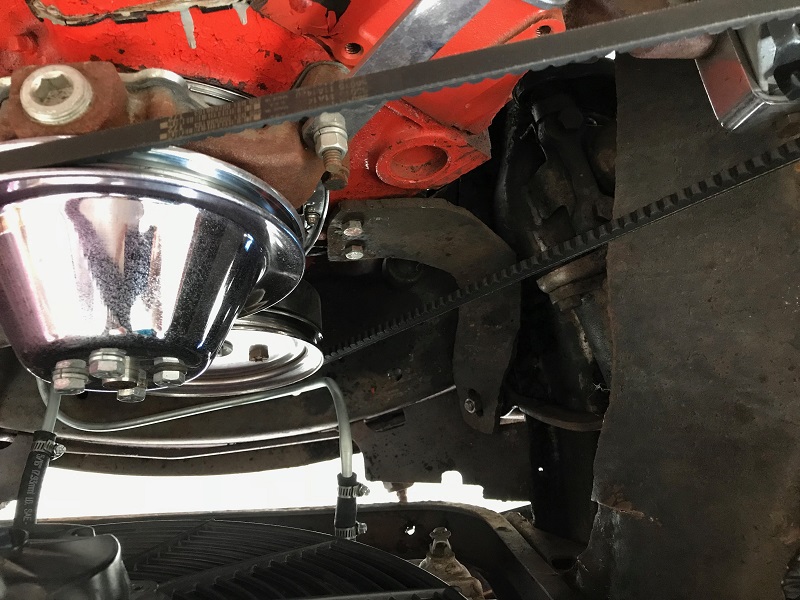
So... we could prop up the engine, remove the mount, remove the shock, and put it all back as is once finished... OR - we could convert to gas shocks and NOT touch the lever arm mount for now. This also means we don't need to service the lever arm shocks which seem to require this more than we like.
[Research]
Upper mount:
In the 1950 Chassis Parts manual, page 236, we see diagram number 1507-12 (upper shock mount) on both the Champion and Commander car frames. Looking up this diagram number we see it is the same part number and name, "524795 Bracket, Steering Knuckle Upper Support Arm Shaft", for both vehicles. So far - so good!
Lower A-Arms:
Chassis Parts manual pages 196 & 198 (9A and 17A respectively) show diagram number 1204-61. However - looking this up we see these ARE different part numbers. Looking over the diagram, and other reference materials, it appears the diagram for the 17A is missing 1205-10 (part ID 525024 "Bracket Control Arm Stabilizer Link") but in the real world it is there - just on the back side. Following a post on Studebaker Drivers Club we decided to move forward.
Lower Shock Mount:
The lower shock mount (that attaches to the lower control arm) is found in the Chassis Parts manual on page 271, diagram number 1801-50 (9A only) Looking this up we see Part number 524852 per page 276. Double checking the diagrams we see that this will mount to the 17A. We also triple checked that the Commander has the 3 bolt holes in the lower control arm. Part 524852 is/was available from mystudebaker.com and are/were $30 each.
Shocks:
Using the "Studebaker Maintenance Parts Cross Reference" maintained by Nat Nagel (link found on Studebaker Drivers Club tips page, THANK YOU!) we see several shocks that can be used as modern day replacements for the 9A. We narrowed the selection to the Monroe 5751 and KYB 343137. Because the 17A coil spring is slightly taller than the 9A (forgot where this idea comes from) we choose the KYB shock. We will also be using a set of coil spring compression clamps to bring the height closer to the 9A and to hopefully lower the stance of the car.
[Purchases]
We ordered the lower shock mounts and all of the shock grommets, retainers, and seats from mystudebaker.com. As they use the Studebaker part numbers this was a very easy process to do over the phone. They had everything we looked up and the service was incredible. It is always a treat to monitor where your order is located within the UPSP delivery process.
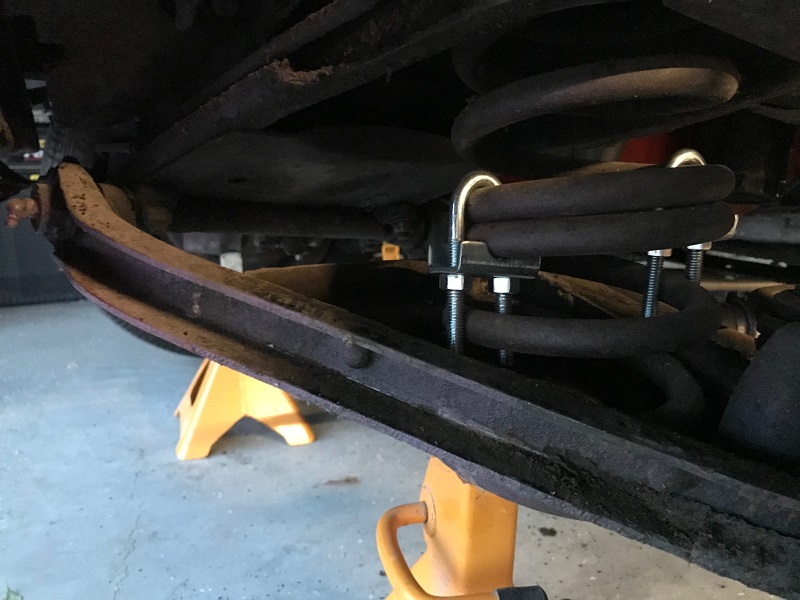
The shocks and coil compression clamps were sourced locally (O'Reillys auto) along with the 3/8"-24 x 1" bolts used to attach to the lower shock mount to the lower A-Arm. Locking washers and hex nuts also were also purchased. The clamps were added because the front of the car simply sat too high.
[Part arrival]
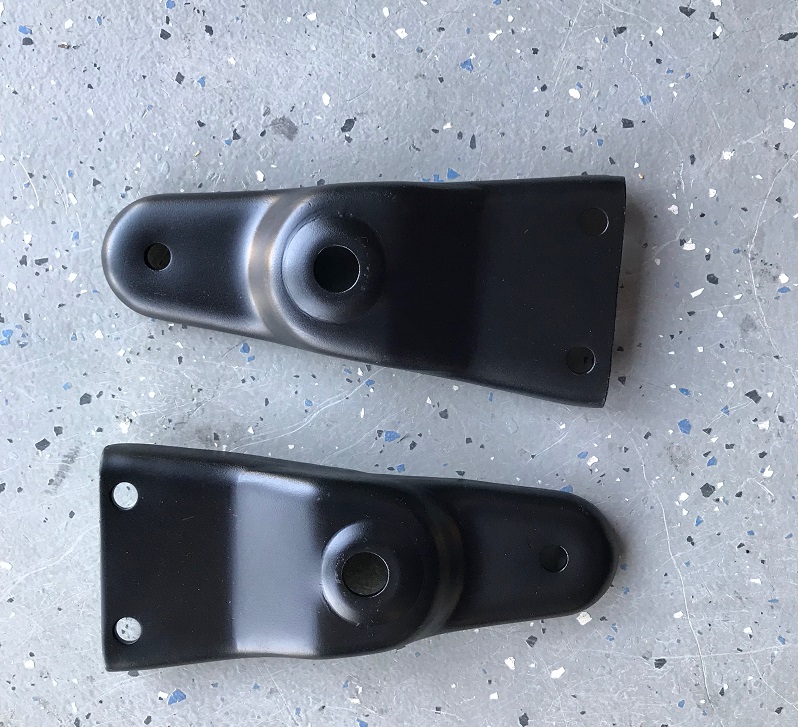
The parts arrived in short order and were inspected. Of course the lower shock mounts had some surface rust, which is expected. This was wire brushed off, primed and painted flat black. (see above)
[Installation]
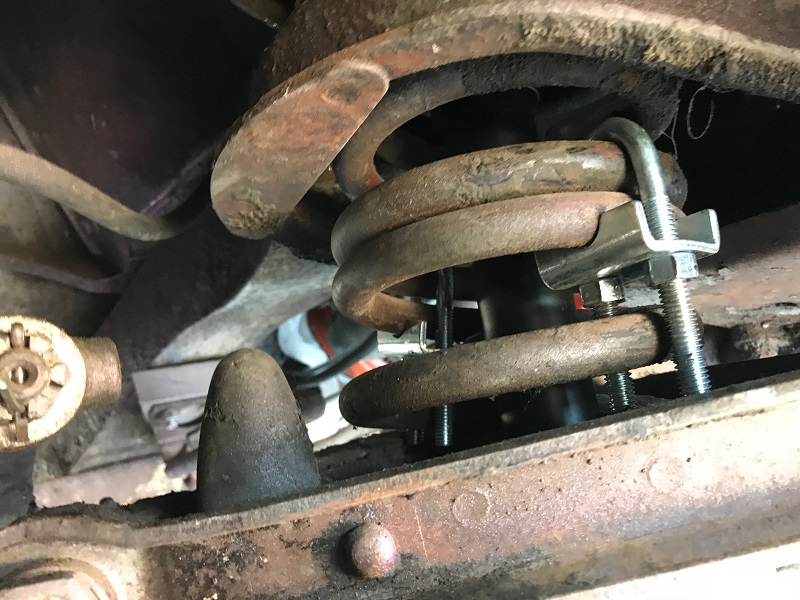
First we installed the coil compression clamps. We thought about this long and hard with the following concerns:
1. Will there be clearance issues once we insert the spring?
2. Once we install the spring will the clamps be needed at all?
3. If we install the spring first will there room to install and tighten the clamps?
In the end we went for it and installed the clamps first.
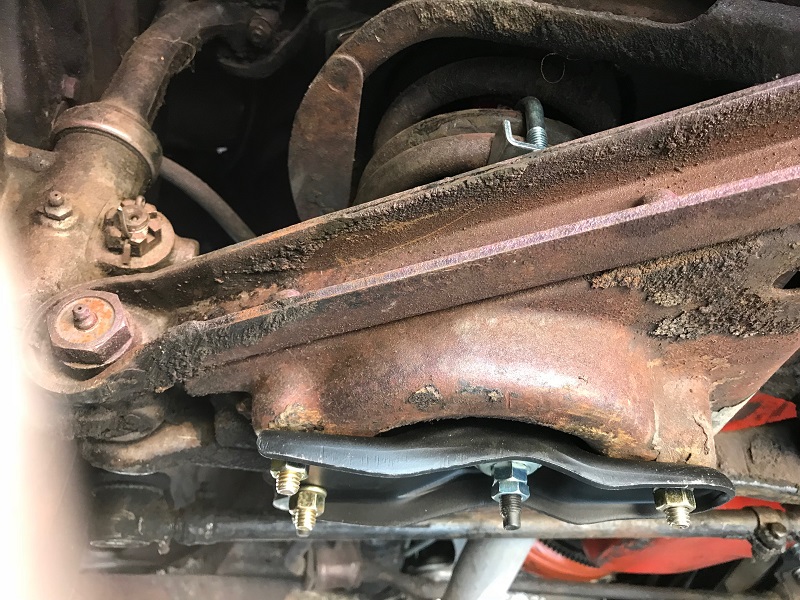
Using the 1950 Shop manual we simple followed the "Installation - Champion" instructions found on page 226. Attach spring (with grommets, retainers, seats) to lower shock mount. Insert through bottom of lower A-arm. Compress coil (read as jack up lower A-arm) and attach to top mount, again with grommets, retainers and sets. Note: we did use one of the KYB grommet seats as is seemed to be a better fit above the shock and under the Steering Knuckle Upper Support Arm Shaft.
[Completed Work]
We also replaced the Upper Control Arm Bumper (part number 526337. It was basically destroyed and now with shocks that actually work it hopefully will not be hit again - but is there just in case. Lastly the issue to the now defunct lever arm dampeners was solved with the fabrication of new motor mounts. The dampeners were simply removed.