For reference:
TPO = The Previous Owner
CAD = Cardboard Aided Design
[Purpose]
To correct something embarrassing before our friends saw it! Well that and perhaps for safety reasons and self preservation.
[Drop Links]
First the easy part to explain.
One of the known issues prior to purchase of the Studebaker was the sway bar drop links. The sway bar "drop links" (read as long bolt with grommets) were in desperate need of replacement. Sure these could have stayed but we were already there and well - they were bad!
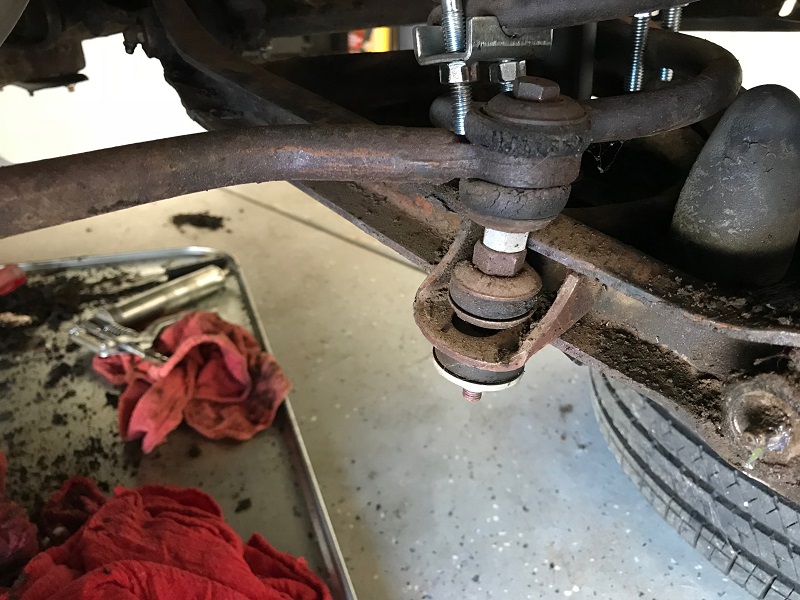
As we just happen to have 8 rubber grommets from the gas shock conversion project this was a no brainer. Use the grommets we already have. With some quick swapping of grommets a few new retainers ("washers") we did a quick reinstall with the original bolting.
This was the easy part as you only need a couple wrenches, a little elbow grease, and voila - new drop links.
[Sway Bar Frame Mounts]
First let us say, "WE DID NOT DO THIS!"
Now the more difficult part - the sway bar frame mounts, but first some back story.
The '50 Commander came with a flat head 6 cylinder engine. TPO resurrected the car from a dirt field and we believe the car was without said engine. TPO installed a small block chevy 327 and a Turbo 350 automatic transmission. All of this to say the original sway bar (at least with its original mounts) would not fit because of the larger/lower transmission.
TPO being somewhat "free wheeling" decided a spacer would be the perfect solution and apparently cast about for something that would do the trick. We believe this was from a recent deck project, as it appears to be TREX DECKING material???
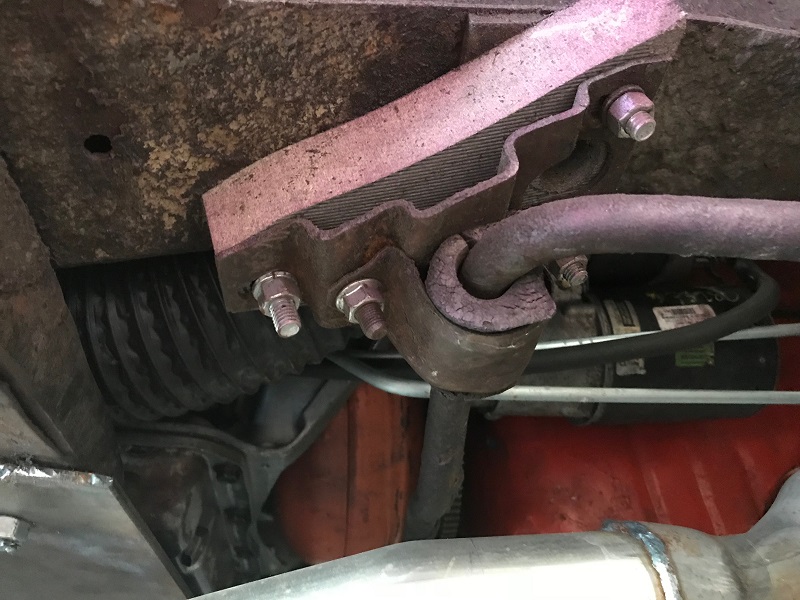
You can see he used the same holes in the frame as the original bracket, which is still in use, and just used longer bolts.
When we first saw this for what it was (after we puchased the car) we were stunned. After removing the "spacer" (Trex/plastic) we saw this:
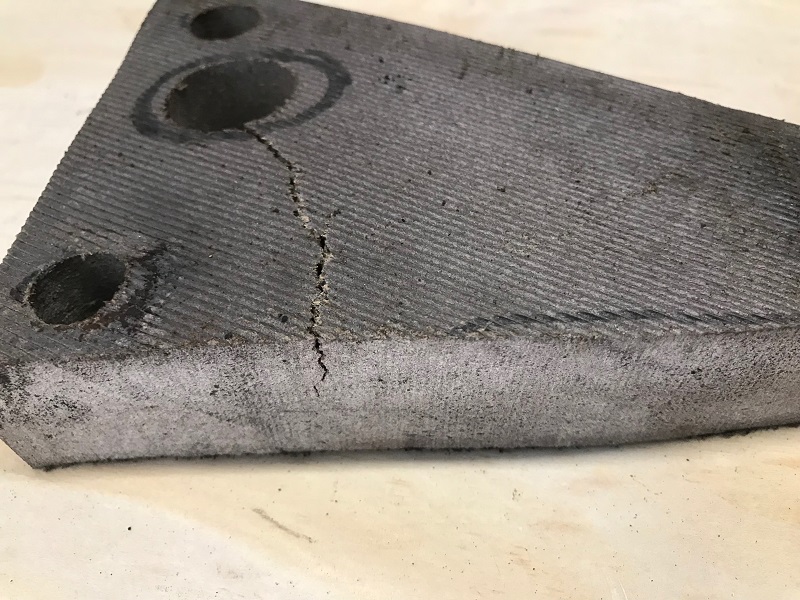
We believe the cracking is due to the "spacer", which is flat, being bolted to the frame over the doubling plate for the body mount. It was at this moment we were glad we where on this mini project.
Looking between the two photos you can see TPO made a flat bottom hole to accomodate the body mount bolt head. The original mounts had a simular hole for this purpose.
We first traced the "spacer" outline, complete with bolt holes in CAD form. This became the template to shape 4 mounting plates out of plate steel. We intended to cut the plates, cut some yet determined "sleeves", and weld it all up into some nice brackets. Then we thought about that doubling plate. We did not want to recreate the same "flat to stepped" bolt up issues that TPO had, so it was time for a quick redesign.
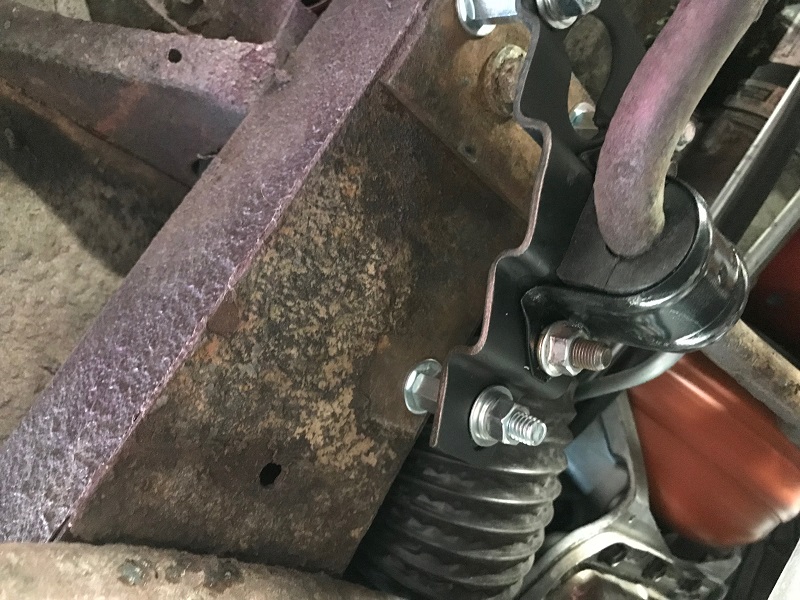
Introducting the barrel connector (coupling nut).
After talking about it with multiple design changes, go CAD, we decided to take the most straight forward approach which also happened to be a bolt on solution. As such, if we did not like it we could simply un-bolt it and move to the next plan. As short as can be stated, our plan works like this. Add washers, replace "spacer" (I still cringe) with barrel connectors. As we mocked this up we realized that unlike TPO design the barrel connectors will have no lateral movement, will add some level of tighting (since they thread on also) and we get around the bolt up issues detailed above.
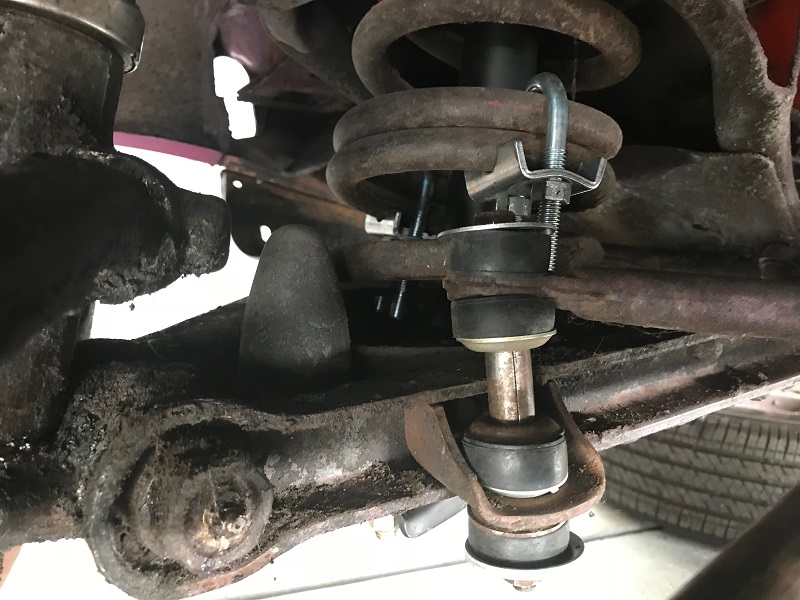
Of course we wire wheeled all returning parts and with some new black paint:
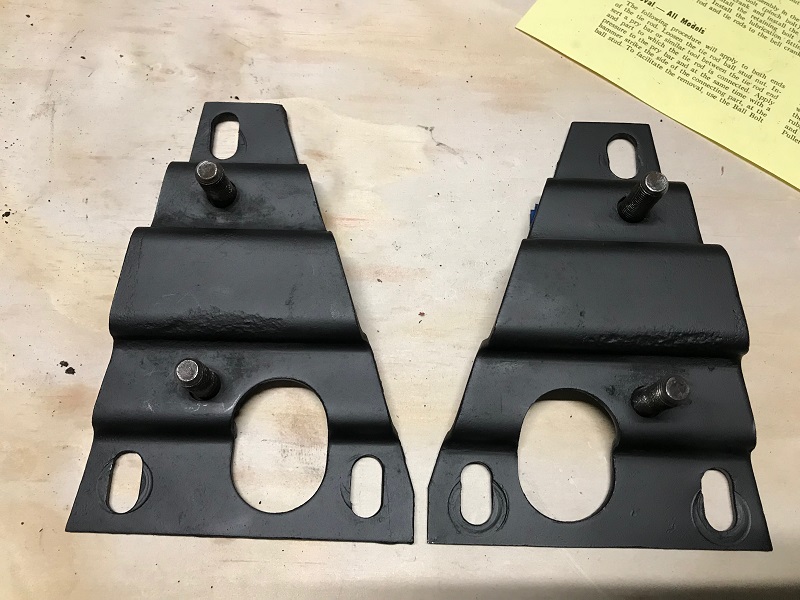
Added two new bushings, bolted the frame mount to the frame with some new bolts just to show off.
Next is putting the bushings on the swaybar and bolting them into place with the bushing bracket. Notice that now the step from the frame to doubling plate is not an issue.
[Completed Work]
While we are sure that a custom, built to suit, sway bar could have been manufactured. And said custom bar would have used the original mounts only. AND that it would of course been very shiny. It would have been expensive as all get and would basically perform the same job. Based on the bushing bracket, which is quite thin, we don't need much reinforcement here. Afterall - it's a Studebaker and it will not be taking corners at any speed of concern.
It IS felt that the Trex/plastic "spacers" (We just can't call them actual spacers) may not have been the smartest/safest thing to do and we are much more at ease with the new all metal mounts we have now! We will monitor this mounting for any signs of movement. If we have to make any changes I am sure you will read about it here!
Update
While working on the Suspension/Steering/Brakes project we ordered EVERYTHING we could. For the sway bar this meant the grommets and bushing retainers. The upper control arm rubber bumper was also replaced.